ionic 2 angular maxlength issue in android devices

In Ionic 2, the maxlength property is working as expected in ios devices and on some android devices. But it doesn't work if the device is using native keyboard. This is the custom directive to make it work in all the devices. In ios, it uses the native maxlength property and in android, it uses custom maxlength property.

import { Directive, EventEmitter, HostListener, Input, Output } from '@angular/core';
import { Platform } from "ionic-angular";

@Directive({
    selector: '[cMaxLength]'
})
export class MaxLengthDirective {

  @Input('cMaxLength') cMaxLength:any;
  @Output() ngModelChange:EventEmitter = new EventEmitter();

  constructor(public platform: Platform) {
  }

  //keypress event doesn't work in ionic android. the keydown event will work but the value doesn't effect until this event has finished. hence using keyup event. 
  @HostListener('keyup',['$event']) onKeyup(event) {
    const element = event.target as HTMLInputElement;
    const limit = this.cMaxLength;
    if (this.platform.is('android')) {
      const value = element.value.substr(0, limit);
      if (value.length <= limit) {
        element.value = value;
      } else {
        element.value = value.substr(0, limit-1);
      }
      this.ngModelChange.emit(element.value);
    }
  }

  @HostListener('focus',['$event']) onFocus(event) {
    const element = event.target as HTMLInputElement;
    if (!this.platform.is('android')) {
      element.setAttribute('maxlength', this.cMaxLength)
    }
  }
}


Usage: Include the above directive in shared module to make use of this in entire application.


Creating Simple Audit Log using grails, Spring Security Listeners, Hibernate Listeners


Simple Audit Log using Grails and Hibernate event listeners
Providing following functionality 1. Loging Insert, Update, Delete of objects 2. Logging Login, Logout events 3. Logging Login Attempt failed event 4. Logging which screen is accessed 1. Create AuditLog domain.
class AuditLog {
    static transient escapeLogAction = true

    User user
    AuditLogType auditLogType // To find which type of action it is. like login, logout, screen access etc
    String value
    Date timeStamp
    String IPAddress
    Date dateCreated
    Date lastUpdated
    AuditLogSource source // To find what is the source of request. like web or system. Some times we run the cron jobs to insert the data. in that case it is "System"

    static constraints = {
        user (nullable: true)
        IPAddress (nullable: true)
        source (nullable: true)
    }
}

2. Create AuditLogType enum in src/groovy folder
enum AuditLogType {
    LOG_IN,
    LOG_OUT,
    FAILED_ATTEMPT,
    SCREEN_ACCESS,
    DATA_CHANGE
}

4. Create AuditLogSource enum in src/groovy folder
enum AuditLogSource {
   WEB,
   SYSTEM
}

3. Create AuditLogListener(src/groovy folder) to log insert/update/delete actions )
import org.hibernate.event.PostDeleteEvent
import org.hibernate.event.PostDeleteEventListener
import org.hibernate.event.PostInsertEvent
import org.hibernate.event.PostInsertEventListener
import org.hibernate.event.PostUpdateEvent
import org.hibernate.event.PostUpdateEventListener
import org.springframework.web.context.request.NativeWebRequest
import org.springframework.web.context.request.RequestAttributes
import org.springframework.web.context.request.RequestContextHolder

import javax.servlet.http.HttpServletRequest
import javax.servlet.http.HttpSession

class AuditLogListener implements PostInsertEventListener, PostUpdateEventListener, PostDeleteEventListener {

    def springSecurityService

    @Override
    void onPostDelete(PostDeleteEvent postDeleteEvent) {
        logAction(postDeleteEvent.entity)
    }

    @Override
    void onPostInsert(PostInsertEvent postInsertEvent) {
        logAction(postInsertEvent.entity)
    }

    @Override
    void onPostUpdate(PostUpdateEvent postUpdateEvent) {
        logAction(postUpdateEvent.entity)
    }

    private void logAction(Object entity) {
 
  //declaring escapeAuditLog = true in a domain will skip the audit log for that domain.
        if (entity.metaClass.hasProperty(entity,'escapeAuditLog') && entity.'escapeAuditLog') {
            return
        }
        HttpServletRequest request = getHttpServletRequest()
        HttpSession session = request?.getSession()
        AuditLog auditLog = new AuditLog()
        auditLog.timeStamp = new Date()
        auditLog.actionType = ActionType.DATA_CHANGE
        auditLog.user = springSecurityService.currentUser
        auditLog.value = entity.getClass().getName()
        auditLog.IPAddress = getRemoteAddress(request)
        auditLog.source = request ? AuditLogSource.WEB : AuditLogSource.SYSTEM
        auditLog.withNewSession {
            auditLog.save(flush: true)
        }
    }

    private HttpServletRequest getHttpServletRequest() {
        RequestAttributes attribs = RequestContextHolder.getRequestAttributes()
        if (attribs instanceof NativeWebRequest) {
            HttpServletRequest request = (HttpServletRequest) ((NativeWebRequest) attribs).getNativeRequest()
            return request
        }
    }
 
 private String getRemoteAddress(HttpServletRequest request) {
        if (!request) return null
        String ipAddress = request.getHeader("X-Forwarded-For")  // X-Forwarded-For: clientIpAddress, proxy1, proxy2
        if (!ipAddress) {
            ipAddress = request.remoteAddr
        }
        return ipAddress.split(",")[0]
    }
}
5. Create LoggingSecurityEventListener(in src/groovy folder) to log the Login, Logout events
import org.apache.log4j.Logger
import org.springframework.beans.factory.annotation.Autowired
import org.springframework.context.ApplicationListener
import org.springframework.security.authentication.event.AuthenticationSuccessEvent
import org.springframework.security.core.Authentication
import org.springframework.security.web.authentication.logout.LogoutHandler

import javax.servlet.http.HttpServletRequest
import javax.servlet.http.HttpServletResponse

class LoggingSecurityEventListener implements ApplicationListener, LogoutHandler {
    private static final log = Logger.getLogger(this)
    def userService

    @Autowired
    HttpServletRequest httpServletRequest // Injected and limited to the current thread per usage

    void onApplicationEvent(AuthenticationSuccessEvent event) {
        event.authentication.with {
            def userName = principal.hasProperty('username')?.getProperty(principal) ?: principal
            log.info("Login success from ${getRemoteAddress(httpServletRequest)} using username $userName")
            logAction(userName, ActionType.LOG_IN, getRemoteAddress(httpServletRequest))
        }
    }

    void logout(HttpServletRequest request, HttpServletResponse response, Authentication authentication) {
        authentication?.with {
            def username = principal.hasProperty('username')?.getProperty(principal) ?: principal
            logAction(username, ActionType.LOG_OUT, getRemoteAddress(request))
        }
    }

    private void logAction(def userName, ActionType actionType, String ipAddress) {
        AuditLog auditLog = new AuditLog()
        auditLog.source = ActionLogSource.WEB
        auditLog.actionType = actionType
        auditLog.value = userName
        auditLog.timeStamp = new Date()
        auditLog.user = User.findByUserName(userName) // modify to get the logged in user
        auditLog.IPAddress = ipAddress
        auditLog.save(flush: true)
    }
 
 private String getRemoteAddress(HttpServletRequest request) {
        if (!request) return null
        String ipAddress = request.getHeader("X-Forwarded-For")  // X-Forwarded-For: clientIpAddress, proxy1, proxy2
        if (!ipAddress) {
            ipAddress = request.remoteAddr
        }
        return ipAddress.split(",")[0]
    }
}
6. Create LoginFailedAuthEventListener(in src/groovy folder) to log login failed attempts
import org.apache.log4j.Level
import org.apache.log4j.Logger
import org.springframework.context.ApplicationListener
import org.springframework.security.authentication.event.AbstractAuthenticationFailureEvent

class LoginFailedAuthEventListener implements ApplicationListener {
    private static final log = Logger.getLogger(this)
    def actionLogService

    void onApplicationEvent(AbstractAuthenticationFailureEvent event) {
        log.setLevel(Level.WARN)
        def userName = event.authentication.principal
        log.warn("Failed login attempt from $event.source.details.remoteAddress using username $userName")
        AuditLog auditLog = new AuditLog()
        auditLog.source = ActionLogSource.WEB
        auditLog.actionType = ActionType.FAILED_ATTEMPT
        auditLog.value = userName
        auditLog.timeStamp = new Date()
        auditLog.IPAddress = event.source.details.remoteAddress
        auditLog.save(flush: true)
    }
}
7. Register all these listners in resources.groovy
import AuditLogListener
import LoggingSecurityEventListener
import LoginFailedAuthEventListener
import org.codehaus.groovy.grails.orm.hibernate.HibernateEventListeners

// Place your Spring DSL code here
beans = {
    loginFailedAuthEventListener(LoginFailedAuthEventListener)

    securityEventListener(LoggingSecurityEventListener)

    auditLogListner(AuditLogListener) {
        springSecurityService = ref("springSecurityService")
    }

    hibernateEventListeners(HibernateEventListeners) {
          listenerMap = ['post-insert':auditLogListner,
                         'post-update':auditLogListner,
                         'post-delete':auditLogListner]
    }
}

8. Create BaseController(in controllers folder) to log Screen Access and extend this controller from every controller
class BaseController {
    def springSecurityService

    def beforeInterceptor = {
        if (!request.xhr) {
            AuditLog auditLog = new AuditLog()
            auditLog.source = ActionLogSource.WEB
            auditLog.timeStamp = new Date()
            auditLog.actionType = ActionType.SCREEN_ACCESS
            auditLog.user = User.get(springSecurityService.principal.id)
            auditLog.IPAddress = getRemoteAddress(request)
            auditLog.value = actionUri
            auditLog.save(flush: true)
        }
        return true
    }
 
 private String getRemoteAddress(HttpServletRequest request) {
        if (!request) return null
        String ipAddress = request.getHeader("X-Forwarded-For")  // X-Forwarded-For: clientIpAddress, proxy1, proxy2
        if (!ipAddress) {
            ipAddress = request.remoteAddr
        }
        return ipAddress.split(",")[0]
    }
}

Forgot Password, Change Password, Reset Password functionality using grails


Forgot Password, Change Password, Reset Password functionality using grails
1. Install grails mail plugin. And configure the mail plugin to email reset password link
compile "org.grails.plugins:mail:1.0.7"

2. Create a domain Token.groovy to generate random token to send reset password link to user email
MongoPersistanceListener.groovy>
import java.util.UUID

class Token {
    String email
    String value = UUID.randomUUID().toString().replaceAll('-', '')
    Date dateCreated

    static mapping = {
        version false
    }

    static constraints = {
    }
}
3. Create a UserService.groovy to send send generate token and send email
class UserService {

    def emailService;

 void sendResetPasswordEmail(User user){
        def token = Token.findByEmail(user.email)
        if(!token) {
            token = new Token(email: user.email)
            token.save(flush: true);
        }
        emailService.sendResetPasswordEmail(user, token)
    }

}

3. Create a EmailService.groovy to send email
import grails.plugin.asyncmail.AsynchronousMailService
import grails.plugin.mail.MailService

class EmailService {

    MailService mailService
    def groovyPageRenderer
    def grailsApplication

 /**
  * Sends the email to given email id
  */
    def sendMail(MailDTO mailDTO) {

        log.info "Sending Mail To ==== ${mailDTO?.toMailId}"

        mailService.sendMail {
            async true
            to mailDTO?.toMailId
            subject mailDTO.subject
            html mailDTO.content
        }
    }

 
 /*
     * Sends the reset password email
     */
    def sendResetPasswordEmail(User user, Token token) {
        MailDTO mailDTO = new MailDTO()
        mailDTO.with {
            toMailId = user?.email
            subject = "Password reset on Mobile Career Index"
            content = groovyPageRenderer.render(template: '/mail/resetPassword', model: [user: user,token:token])
        }
        sendMail(mailDTO)
    }
}
3. Create MailDTO.groovy in src/groovy folder
class MailDTO {
    String toMailId
    List ccMailIds
    String subject
    String content
}
3. Create UserController.groovy

import org.codehaus.groovy.grails.plugins.springsecurity.SpringSecurityUtils
import grails.plugins.springsecurity.Secured
import org.codehaus.groovy.grails.validation.Validateable

class UserController {

    def userService

    def forgotPassword = {

        requireLogout()

        if (request.get) {
            render view: "/user/forgotPassword"
            return;
        }

        String email = params.email
        if (!email) {
            flash.error = message(code: 'spring.security.forgotPassword.username.missing')
            redirect action: 'forgotPassword'
            return
        }

        def user = User.findByEmail(email);
        if (!user) {
            flash.error = message(code: 'spring.security.forgotPassword.user.notFound')
            redirect action: 'forgotPassword'
            return
        }

        userService.sendResetPasswordEmail(user);
        flash.message = message(code: 'spring.security.forgotPassword.sent')
        render view: "/user/forgotPassword"
    }

 @Secured(['IS_AUTHENTICATED_ANONYMOUSLY'])
    def resetPassword = { ResetPasswordCommand command ->

        requireLogout();
        flash.message = null;
        String tokenValue = params.token

        def token = tokenValue ? Token.findByValue(tokenValue) : null
        if (!token) {
            flash.error = message(code: 'spring.security.resetPassword.badCode')
            redirect controller: "home"
            return
        }

        if (request.get) {
            render view: "/user/resetPassword" , model:[token: token, command: new ResetPasswordCommand()]
            return
        }

        command.email = token.email
        command.validate()

        if (command.hasErrors()) {
            flash.error = message(code: 'spring.security.resetPassword.badCode')
            render view: "/user/resetPassword" , model:[token: token, command: command]
            return
        }

        Token.withTransaction { status ->
            def user = User.findByEmail(token.email);
            user.password = command.password
            user.save(flush: true)
            token.delete(flush: true)  ;
        }

        springSecurityService.reauthenticate token.email

        flash.message = message(code: 'spring.security.resetPassword.success')
        def config = SpringSecurityUtils.securityConfig
        redirect uri: config.successHandler.defaultTargetUrl
        return
    }

    @Secured(['IS_AUTHENTICATED_FULLY'])
    def editPassword = { EditPasswordCommand command ->

        flash.message = null;

        if (request.get) {
            render view: "/user/editPassword" , model:[command: new EditPasswordCommand()]
            return
        }

        command.validate()

        if (command.hasErrors()) {
            render view: "/user/editPassword" , model:[command: command]
            return
        }
        User user = springSecurityService.currentUser;
        String encodedPassword = springSecurityService.encodePassword(command.currentPassword)
        if (encodedPassword != (user.password)) {
            flash.error = message(code: 'command.password.error.invalid')
            render view: "/user/editPassword" , model:[command: new EditPasswordCommand()]
            return;
        }
        user.password = command.password
        user.save(flush: true);

        flash.message = message(code: 'spring.security.resetPassword.success')
        render view: "/user/editPassword" , model:[command: new EditPasswordCommand()]
    }
}

@Validateable
class ResetPasswordCommand {
    String email
    String password
    String password2

    static constraints = {
        email nullable: false, email: true
        password blank: false, nullable: false
        password2 validator: password2Validator
    }

    static final password2Validator = { value, command ->
        if (command.password != command.password2) {
            return 'command.password2.error.mismatch'
        }
    }
}

@Validateable
class EditPasswordCommand {

    String currentPassword
    String password
    String password2

    static constraints = {
        currentPassword blank: false, nullable: false
        password blank: false, nullable: false
        password2 validator: password2Validator
    }

    static final password2Validator = { value, command ->
        if (command.password != command.password2) {
            return 'command.password2.error.mismatch'
        }
    }
}

I have used parsley.js to validate the forms Create forgotPassword.gsp in views/user folder


    Forgot Password


Reset Password


Submit
Create resetPassword.gsp in views/user folder


    Reset Password


Reset Password


Submit
Create editPassword.gsp in views/user folder


    Change Password


Change Password


Cancel Update

Custom Persistence Listener in Mongodb Grails plugin


Mongodb grails persistance listeners to assign default properties
Mongodb doesn't support extending the base class to assign values to common properties like updatedOn, createdOn etc.
Hibernate has support to extend the class to a domain and assign the properties. In grails mongodb we can acheive this using Grails persistance listeners.
1. Install mongodb plugin in grails (BuildConfig.groovy).
compile "org.grails.plugins:mongodb:5.0.7.RELEASE"

2. Now Create Perstitance Listener by extending AbstractPersistenceEventListener in src/groovy. AbstractPersistenceEventListener will provide onPersistenceEvent and we can capture PreInsert, PreUpdate ... events
MongoPersistanceListener.groovy>
import org.grails.datastore.mapping.core.Datastore
import org.grails.datastore.mapping.engine.event.AbstractPersistenceEvent
import org.grails.datastore.mapping.engine.event.AbstractPersistenceEventListener
import org.grails.datastore.mapping.engine.event.PreDeleteEvent
import org.springframework.context.ApplicationEvent

import org.grails.datastore.mapping.engine.event.EventType

class MongoPersistanceListener extends AbstractPersistenceEventListener  {

    def springSecurityService

    public MongoPersistanceListener(final Datastore datastore, def springSecurityService) {
        super(datastore)
        this.springSecurityService = springSecurityService
    }
    @Override
    protected void onPersistenceEvent(final AbstractPersistenceEvent event) {
        def entity = event.entityObject
        switch(event.eventType) {
            case EventType.PreInsert:
                initDefaults(entity)
                break
            case EventType.PostInsert:
                break
            case EventType.PreUpdate:
                def currentUser = springSecurityService.getCurrentUser()
                event.entityObject.updatedBy = currentUser ? currentUser.id : 0;
                event.entityObject.updatedOn = new Date();
                break;
            case EventType.PostUpdate:
                break;
            case PreDeleteEvent:
                break;
            case EventType.PostDelete:
                break;
            case EventType.PreLoad:
                break;
            case EventType.PostLoad:
                break;
            case EventType.Validation:
                initDefaults(entity)
                break;
        }
    }

    @Override
    public boolean supportsEventType(Class eventType) {
        return true
    }

    void initDefaults(entity) {
        def currentUser = springSecurityService.getCurrentUser()
        if (entity.createdBy == null) {
            entity.createdBy = currentUser? currentUser.id : 0;
        }
        if (entity.createdOn == null) {
            entity.createdOn = new Date();
        }
        if (entity.updatedBy == null) {
            entity.updatedBy = currentUser? currentUser.id : 0;
        }
        if (entity.updatedOn == null) {
            entity.updatedOn = new Date();
        }
    }
}

3. Register this listener in Bootstrap.groovy init method
class BootStrap {

 def springSecurityService

    def init = { servletContext ->
        def ctx = Holders.grailsApplication.mainContext
        ctx.getBeansOfType(Datastore).values().each { Datastore d ->
            ctx.addApplicationListener( new MongoPersistanceListener(d, springSecurityService))
        }
    }
    def destroy = {
    }
}
This listener will be invoked when database event is triggered.

Hosting grails application in openshift

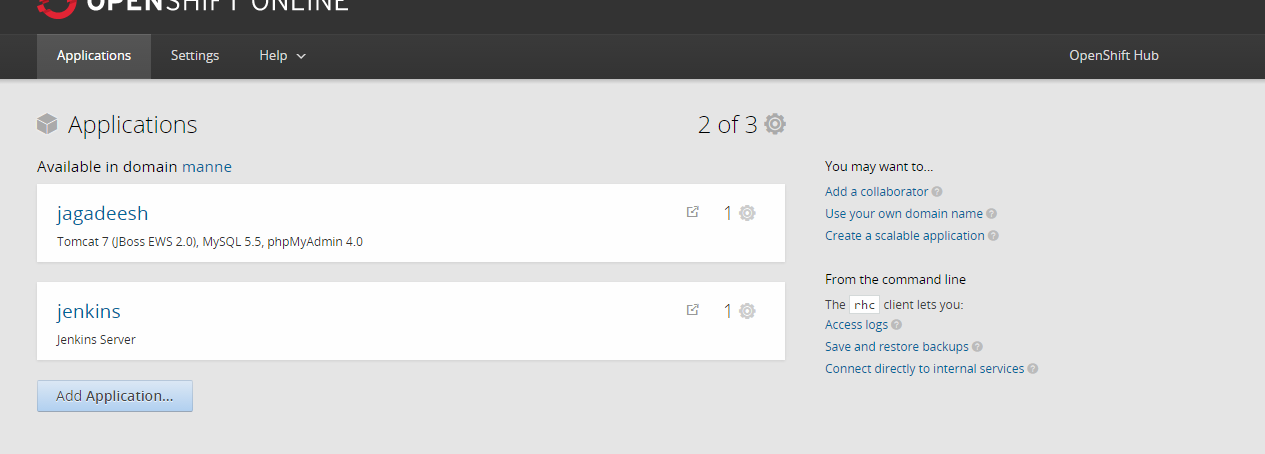
Hosting a grails application on free hosting provider (openshift) 1. Create account in https://www.openshift.com/ 2. Login to openshift web console 3. click on add application
4. Select Tomcat 7 (JBoss EWS 2.0) from the list of applications
5. Enter public url and select other configuration and create application. Leave blank in git hub url.
6. Go to applications page -> go to the application that you have created -> add mysql to the application.
7. Click on add Cartridge
8. Now add phpmyadmin catridge to the application by selecting clicking on phpmyadmin
9. Database Setup : Go to the application details page and find database username and password in mysql section
10. Launch phpmyadmin by using the mysql usernamd and password provided in the application details page to add or modify database and mysql users.
11. Note the server ip address to configure our grails application with mysql database
12. Login to SSH by reading instructions on https://developers.openshift.com/managing-your-applications/remote-connection.html
Make sure to add your public key in openshift account settings.  13. Generate war file for grails application using war command.
 14. Download https://winscp.net/eng/download.php and connect to ssh to upload war file. 13. Upload war file to the path app-root/runtime/dependencies/jbossews/webapps using WinSCP 14. Now we need to restart the tomcat server from ssh. After connecting to ssh run the command "gear start --cart jbossews-2.0"
 15. Now the grails application will be running on openshift server that any one can access

Loading spinner using jquery spin js and blockui plugin

Loading spinner using jquery spin.js and jquery block ui plug-ins. We can have multiple loaders in same page. Spinner will display inside the element. we need to adjust css settings to align the spinner. we can remove block ui related code in spinner to make the other areas in the page is click-able.
1. Include jquery
2. Include spin js http://fgnass.github.io/spin.js/
3. Include block ui http://malsup.com/jquery/block/


To display loader
APP.UI.showLoader($('jquery-selector'));
To hide loader
APP.UI.hideLoader($('jquery-selector'));
you can have multiple loaders in same page, by using different jquery selectors.

Grails Spock Testing Where Block Passing Dynamic Objects


Grails Spock testing passing dynamic objects in where block
To fix "Only @Shared and static fields may be accessed from here" issue in spock integration test with where block we need to use @Shared annotation while declaring variables and need to initialize them in setupSpec() method
Sample implementation
@TestMixin(IntegrationTestMixin)
class SpockExampleIntegrationTests  extends Specification {
    @Shared String email1
    @Shared String email2
 
    void setup() {
          email1 = "mannejkumar@gmail.com"
          email2 = "jk.manne@yahoo.com"
    }
 
    def testGetEmployeeById() {
  
        setup:
        Employee employee
  
        when:
        employee = employeeService.getEmployeeById(employeeId)

        then:
        employee.email == result

        where:
        sno |   employeeId     |     result     
        1   |   1              |     email1
        2   |   2              |     email2
   }
}

Adding properties to domain classes on the fly using groovy propertyMissing feature


Adding properties to domain classes on the fly using groovy propertyMissing feature
Some times we need to add properties to domain classes on the fly.
Groovy supports propertyMissing for dealing with property resolution attempts. Steps to added dynamic properties to domain classes.
1. Create Entity.groovy class in src/groovy folder and use groovy propertyMissing feature in Entity class
class Entity {
   def dynamicProperties= [:]
   //setter
   def propertyMissing(String name, value) { dynamicProperties= [name] = value }
   //getter
   def propertyMissing(String name) { dynamicProperties= [name] }
}

2. Now extend Entity class from your domain class
User.groovy>
class User extends Entity{
   String firstName
   String lastName
   
}
Address.groovy
class Address extends Entity{
   String country   
}

3. Testing the dynamic properties
class DynamicPropertyTester {

   static void main(String[] args) {

 User user = new User();
        user.firstName = "Jagadeesh";
        user.lastName = "Manne";
        user.name = "$user.firstName $user.lastName"; //adding dynamic property "name" that doesnt exist in User domain
        println "Name : $user.name"; 
        //out put 
        //Name : Jagadeesh Manne
        
        Address address = new Address();
        address.country = "India";
        address.state = "AP";      //dynamic property
        address.city = "Vijayawada"; // dynamic property
        println "Country : $address.country, State : $address.state, City: $address.city" 
        //out put
        // Country : India, State : AP, City: Vijayawada
 
   }
   
}

Connection Pool in Java & JDBC

Connection Pooling in JDBC In software engineering, a connection pool is a cache of database connections maintained so that the connections can be reused when future requests to the database are required. Connection pools are used to enhance the performance of executing commands on a database. Opening and maintaining a database connection for each user, especially requests made to a dynamic database-driven website application, is costly and wastes resources. In connection pooling, after a connection is created, it is placed in the pool and it is used over again so that a new connection does not have to be established. If all the connections are being used, a new connection is made and is added to the pool. Connection pooling also cuts down on the amount of time a user must wait to establish a connection to the database.(source :wikipedia)

Steps to create connection pool in jdbc
1. Create Configuration class that holds Database Configuration
2. Create JdbcConnectionPool class that Creating and managing the connections
3. Create DataSource class to get connection and returning the connection to connection pool

1. Configuration Class (Configuration.java)
a. Make the configuration class as singleton
public class Configuration {
 private static Configuration configuration = new Configuration();
 
 public static Configuration getInstance(){ 
  return configuration;
 }
}

b. Create initialize method that sets the database configuration properties
public class Configuration {

 public String DB_USER_NAME ;
 
 public String DB_PASSWORD ;
 
 public String DB_URL;
 
 public String DB_DRIVER;
 
 public Integer DB_MAX_CONNECTIONS;
 
 private void init() {
  DB_USER_NAME = "root"
  DB_PASSWORD = "root"
  DB_URL = "jdbc:mysql://localhost:3306/jmanne"
  DB_DRIVER = "com.mysql.jdbc.Driver"
  DB_MAX_CONNECTIONS = 5
 }
 
}

c. Call the init method in the constructor
 public Configuration(){
  init();
 }

Finally Configuration.java
public class Configuration {
 
 public String DB_USER_NAME ;
 
 public String DB_PASSWORD ;
 
 public String DB_URL;
 
 public String DB_DRIVER;
 
 public Integer DB_MAX_CONNECTIONS;
 
 public Configuration(){
  init();
 }
 
 private static Configuration configuration = new Configuration();
 
 public static Configuration getInstance(){ 
  return configuration;
 }
 
 private void init() {
  DB_USER_NAME = "root"
  DB_PASSWORD = "root"
  DB_URL = "jdbc:mysql://localhost:3306/jmanne"
  DB_DRIVER = "com.mysql.jdbc.Driver"
  DB_MAX_CONNECTIONS = 5
 }
}

2. Creating JDBCConnectionPool.java 

a. Create an empty array list to hold the connections
public class JdbcConnectionPool {
 List availableConnections = new ArrayList();
}

b. Get the database configuration from Configuration.java and Create a new Connection
private Connection createNewConnectionForPool() {
    // get the configuraiton object to get the database configuration
 Configuration config = Configuration.getInstance();
 try {
     //load the Database driver using Class.forName
  Class.forName(config.DB_DRIVER);
  // Create connection by using DriverManager
  Connection connection = (Connection) DriverManager.getConnection(
    config.DB_URL, config.DB_USER_NAME, config.DB_PASSWORD);
  return connection;
 } catch (ClassNotFoundException e) {
  e.printStackTrace();
 } catch (SQLException e) {
  e.printStackTrace();
 }
 return null;
 
}

c. Initialize the connection pool and check the connection pool is full and if connection pool is empty then add new connection
private void initializeConnectionPool()
{
 while(!checkIfConnectionPoolIsFull())
 {
  availableConnections.add(createNewConnectionForPool());
 }
} 
private synchronized boolean checkIfConnectionPoolIsFull() {
 final int MAX_POOL_SIZE = Configuration.getInstance().DB_MAX_CONNECTIONS;
 // check the connections size in the available connections
 if(availableConnections.size() < MAX_POOL_SIZE)
 {
  return false;
 }

 return true;
}

d. Get the connection from connection pool
 
public synchronized Connection getConnectionFromPool() {
 Connection connection = null;
 if(availableConnections.size() > 0)
 {
  connection = (Connection) availableConnections.get(0);
  availableConnections.remove(0);
 }
 return connection;
}

e. Return the connection to connection pool
  
public synchronized void returnConnectionToPool(Connection connection) {
 availableConnections.add(connection);
}

f. initialize the connection pool in the constructor
public JdbcConnectionPool() {
 initializeConnectionPool();
}

3. Creating DataSource class to get the connection and return the connection
import java.sql.SQLException;
import com.mysql.jdbc.Connection;

public class DataSource {
 
 static JdbcConnectionPool pool = new JdbcConnectionPool();
 
 public static Connection getConnection() throws ClassNotFoundException, SQLException{
  Connection connection = pool.getConnectionFromPool();
  return connection;
 }
 
 public static void returnConnection(Connection connection) {
  pool.returnConnectionToPool(connection);
 }
}
 
Now We can use DataSource class to get the connection
Connection connection = DataSource.getConnection();

Final Source code
1. Configuration.java
package com.jmanne.utils;

public class Configuration {
 
 public String DB_USER_NAME ;
 
 public String DB_PASSWORD ;
 
 public String DB_URL;
 
 public String DB_DRIVER;
 
 public Integer DB_MAX_CONNECTIONS;
 
 public Configuration(){
  init();
 }
 
 private static Configuration configuration = new Configuration();
 
 public static Configuration getInstance(){ 
  return configuration;
 }
 
 private void init(){
  DB_USER_NAME = "root"
  DB_PASSWORD = "root"
  DB_URL = "jdbc:mysql://localhost:3306/jmanne"
  DB_DRIVER = "com.mysql.jdbc.Driver"
  DB_MAX_CONNECTIONS = 5
 }

}

2. JdbcConnectionPool.java
package com.jmanne.db;

import java.sql.DriverManager;
import java.sql.SQLException;
import java.util.ArrayList;
import java.util.List;

import com.jmanne.utils.Configuration;
import com.mysql.jdbc.Connection;

public class JdbcConnectionPool {
 
 List availableConnections = new ArrayList();

 public JdbcConnectionPool()
 {
  initializeConnectionPool();
 }

 private void initializeConnectionPool()
 {
  while(!checkIfConnectionPoolIsFull())
  {
   availableConnections.add(createNewConnectionForPool());
  }
 }

 private synchronized boolean checkIfConnectionPoolIsFull()
 {
  final int MAX_POOL_SIZE = Configuration.getInstance().DB_MAX_CONNECTIONS;

  if(availableConnections.size() < MAX_POOL_SIZE)
  {
   return false;
  }

  return true;
 }

 //Creating a connection
 private Connection createNewConnectionForPool()
 {
  Configuration config = Configuration.getInstance();
  try {
   Class.forName(config.DB_DRIVER);
   Connection connection = (Connection) DriverManager.getConnection(
     config.DB_URL, config.DB_USER_NAME, config.DB_PASSWORD);
   return connection;
  } catch (ClassNotFoundException e) {
   e.printStackTrace();
  } catch (SQLException e) {
   e.printStackTrace();
  }
  return null;
  
 }

 public synchronized Connection getConnectionFromPool()
 {
  Connection connection = null;
  if(availableConnections.size() > 0)
  {
   connection = (Connection) availableConnections.get(0);
   availableConnections.remove(0);
  }
  return connection;
 }

 public synchronized void returnConnectionToPool(Connection connection)
 {
  availableConnections.add(connection);
 }
}

3. DataSource.java
package com.jmanne.db;

import java.sql.SQLException;

import com.mysql.jdbc.Connection;

public class DataSource {
 
 static JdbcConnectionPool pool = new JdbcConnectionPool();
 
 public static Connection getConnection() throws ClassNotFoundException, SQLException{
  Connection connection = pool.getConnectionFromPool();
  return connection;
 }
 
 public static void returnConnection(Connection connection) {
  pool.returnConnectionToPool(connection);
 }
}
checking the website is responsive or not using selenium and groovy, grails and java


checking the website is responsive or not using selenium and groovy, grails and java
Here i am providing the way to find the given website is responsive or not using selnium and grails. We can acheive this in multiple ways
1. Screenshot comparison : Using selenium webdriver go to the given website url and change the browser to different sizes and compare the screenshots.If both screenshots are same then the given website is not responsive.If both screenshots are different then given website is responsive. This method is not good because Lets assume if slideshows are present in given website while taking the screenshots of that website, the slideshow images present in the given website may change and we will get different screenshots so if we compare the screenshots we will get result as both screenshots are different and we may get response as the given site is responsive

2. The document width : Using selenium webdriver go to the given website url and change the browser to mobile device size and execute the javascript to get document width. If width is less than mobile devices maximum width we can assume that the given website is responsive

3. Screenshot width : Using selenium webdriver go to the given website url and change the browser to mobile device size and take the screenshot and get the width of the screenshot image. If width is less than mobile devices maximum width we can assume that the given website is responsive. I tested multiple sites with this approach and got the expected result Steps to check given site is responsive or not

1. Add selenium dependencies in BuildConig.groovy
compile 'org.seleniumhq.selenium:selenium-support:2.15.0'
compile 'org.seleniumhq.selenium:selenium-htmlunit-driver:2.25.0'
runtime('org.seleniumhq.selenium:selenium-java:2.29.1'){
 excludes "selenium-htmlunit-driver"
}

2. Create firefoxprofile
 DesiredCapabilities capabilities = new DesiredCapabilities("firefox", "3.6.", Platform.LINUX);
 FirefoxProfile profile = new FirefoxProfile();

3. Create Remote Web Driver by specifying selenium server url
driver = new RemoteWebDriver(new java.net.URL("http://127.0.0.1:4444//wd/hub"), capabilities);

4. Set the window size to mobile device size
driver.manage().window().setSize(new Dimension(320, 480))

5. Open the url
 driver.get(urlString)

6. Method 1 : Take the Screenshot and get the width of the screenshot. RemoteDriver doesnt implement the TAkeScreenShot class. If the driver does have the Capabilities to take a screenshot.Then Augmenter will add the TakesScreenshot methods to the instance
File screenShot = ((TakesScreenshot) driver).getScreenshotAs(OutputType.FILE);
BufferedImage bufferedImage = ImageIO.read(screenShot);
int width = bufferedImage?.width

Method 2 : Execute the javascript and get the document width
 JavascriptExecutor js = (JavascriptExecutor)driver;
 int width = js.executeScript("return \$(document).width()")

7. Compare the width with mobile device maximum width
//Asuming mobile device width is 480
boolean isResponsive = (width <= 480)

8. run the selenium server
 java -jar seleniumserver.jar
Getting all together in one groovy class called MobileUtils.groovy. Make sure that you have given valid url otherwise validate the given url and show the error message if the given url is invalid
class MobileUtils {
 import org.openqa.selenium.Platform
 import org.openqa.selenium.WebDriver
 import org.openqa.selenium.firefox.FirefoxDriver
 import org.openqa.selenium.firefox.FirefoxProfile
 import org.openqa.selenium.remote.DesiredCapabilities
 import org.openqa.selenium.remote.RemoteWebDriver
 import org.openqa.selenium.remote.Augmenter
 import org.openqa.selenium.Dimension
 import org.openqa.selenium.TakesScreenshot
 import org.openqa.selenium.OutputType
 import org.openqa.selenium.io.TemporaryFilesystem
 import java.awt.image.BufferedImage
 import javax.imageio.ImageIO

 //by taking screenshot and comparing width
 boolean isResponsiveByJs(String url) {
  WebDriver driver = null
  boolean isResponsive = false
  try {
   DesiredCapabilities capabilities = 
   new DesiredCapabilities("firefox", "3.6.", Platform.LINUX);
   FirefoxProfile profile = new FirefoxProfile();
   capabilities.setCapability(FirefoxDriver.PROFILE, profile);
   driver = 
 new RemoteWebDriver(new java.net.URL("http://127.0.0.1:4444//wd/hub"), capabilities);
   driver = new Augmenter().augment(driver);
   driver.manage().window().setSize(new Dimension(320, 480))
   driver.get(url)
   JavascriptExecutor js = (JavascriptExecutor)driver;
            int width = js.executeScript("return \$(document).width()")
   isResponsive = (bufferedImage?.width <= 480);
  } finally {
      //delete the temporary files created by selenium firefox profile
   TemporaryFilesystem.getDefaultTmpFS().deleteTemporaryFiles()
   driver?.quit()
  }
  return isResponsive
    }
 
 // by executing javascript
 boolean isResponsiveByScreenshot(String url) {
  WebDriver driver = null
  boolean isResponsive = false
  try {
   DesiredCapabilities capabilities = 
   new DesiredCapabilities("firefox", "3.6.", Platform.LINUX);
   FirefoxProfile profile = new FirefoxProfile();
   capabilities.setCapability(FirefoxDriver.PROFILE, profile);
   driver = new RemoteWebDriver(new java.net.URL("http://127.0.0.1:4444//wd/hub"), capabilities);
   driver = new Augmenter().augment(driver);
   driver.manage().window().setSize(new Dimension(320, 480))
   driver.get(url)
   File screenShot = ((TakesScreenshot) driver).getScreenshotAs(OutputType.FILE);
   BufferedImage bufferedImage = ImageIO.read(screenShot);
   int width = bufferedImage.width
   isResponsive = (bufferedImage?.width <= 480);
   
  } finally {
      //delete the temporary files created by selenium firefox profile
   TemporaryFilesystem.getDefaultTmpFS().deleteTemporaryFiles()
   driver?.quit()
  }
  return isResponsive
 }
}
If you have better idea than these methods please let me know in comments.